Project 4
Project 4 introduced the premise of having “clients” for whom we were tasked with making a product– more or less any product. This seemed to cause wide-scale confusion, since it was not immediately clear what kind of expectation of completeness came along with the introduction of real live human beings who were giving their time and energy to describe their daily lives and health issues to the first-year engineering class. In Project 3, we knew what “success” looked like: if the mechanism dumped the recycling into the bin, we’ve succeeded. The definition of “success” here was somewhat obscure. Was the bare minimum accomplishment supposed to be creating an object ready to be physically given to the clients at the end of the two-month period of the project, with the expectation that they would be able to use it regularly and find it helpful? How useful is the object supposed to be to “count,” especially when compared against the assumed null hypothesis of having one fewer gadgets to keep track of?
Also: what, exactly, would a useful object do? “Problem framing” was supposed to be the focus of the first few weeks of this project, during which the clients, Tim and Kim, came on Zoom to the class lectures; but they didn’t (perhaps had been instructed not to?) actually make any “asks.” Labs for the first few weeks of this process involved mostly group discussions. Unfortunately, the techniques of planning and decision-making that the class was intended to teach, which were required for lab submissions, seemed to actively hinder the process when the goal was so nebulous to begin with. Much has been made during this course of the importance of a “problem statement” that is “solution neutral”; i.e., you want to express the reason for solving a particular problem and the metrics that will tell you whether or not you’ve done so, without committing to, making reference to, or ruling out specific design elements. This makes excellent sense for most professional situations, where a client will come to an engineering firm with a specific thing they need done, made, or improved upon. Solution-neutral problem framing means keeping the big picture in mind and ensuring that the client’s needs aren’t overshadowed by the design process itself.
In this case, however, there seemed to be a lot of confusion about how to generate a “solution-neutral” problem statement without a particularly well-defined problem. Kim and Tim are a couple who both have complex health issues and disabilities. Tim is almost completely blind, and Kim is a power-chair user; there is a large set of problems associated with disability that are simply not solvable, especially not within two months with limited resources of fabrication and, frankly, skill. Many groups seemed to be struggling with the insistence that we state a problem that we were going to solve, without hinting that we had any ideas at all about how to solve it. True solution-neutral problem framing, in this case, would mean committing to solving a problem that you may quickly realize isn’t going to be successfully solved. And there is, of course, an inverse relationship between the significance of a problem and the ease with which it can be solved; the problems of lack of sight, lack of mobility and pain are both the most significant and the ones not likely to be solved in the scope of this project. What’s left, then, is mostly “gadgets” which may or may not end up solving small annoyances.
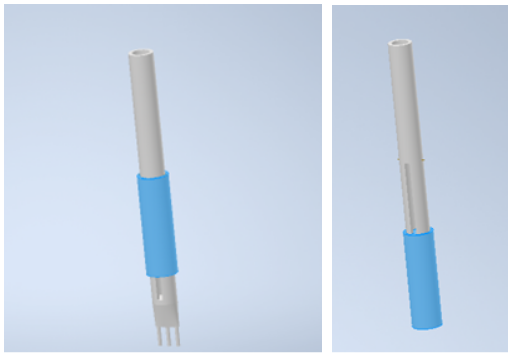
My group had, then, several different concepts for gadgets to choose between, many of which seemed common to many different groups. Tim talked about the challenges of cooking now that he has entirely lost his sight, and kitchen gadgets are a category where it seemed possible to come up with a well-defined problem to solve within the time available, so a quick glance around the 1P13 classroom revealed a veritable warehouse of souped-up utensils. Our three main contenders were an Arduino-controlled device which read out the level of water being poured into a vessel (a device that already exists in a smaller form factor than we would be able to build, and ended up being created by at least one other group for the project), a cutting board with a bunch of Handy™ attachments, which is what we and several other groups ended up doing, and an auto-cutting fork, which I was a little fond of on the grounds that it was at least unique, if somewhat impractical:
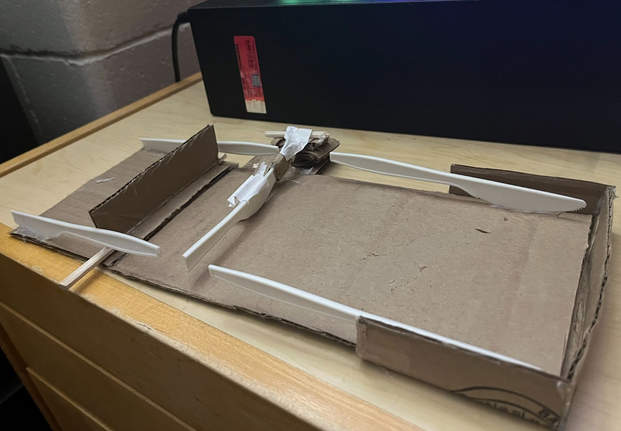
 …yeah, it may not look like much, but… OK, there’s no but to that sentence. If we had the ability to fabricate metal, it could have worked– the idea, not exactly clear from a very quick CAD example, would be to have a fork that used a little spring to move a circular wraparound knife up and down; so you can stick the fork into the food, push the knife down to cut a piece of food around the tines, retract the knife (have it held up there or covered somehow so it’s not pointing at your face?), then use it as a fork. As it is, fork tines aren’t a good candidate for 3D printing because they need to get very thin, laser cutting can only cut flat parts along a single plane, and we would have no way of fabricating a circular knife. So, cutting board it was. A groupmate made a cardboard version of the concept, which a) holds the tip of the knife in place, b) has a slide to push food off the board, and c) has a container on the side for the food to be pushed into.
 After this, we spent quite a while trying to figure out how to fabricate a better version with the resources available. The two methods of fabrication available through the class are 3D printing and laser cutting of acrylic. Most of the components we needed were long and flat; theoretically candidates for laser cutting, except that they were longer than the sheet of acrylic that each group was supposedly limited to. (Later we learned that the stated limits were more guidelines than actual rules, but that wasn’t officially circulated information.) Of course there are ways to buy all sorts of these materials, such as a knife– but aren’t we supposed to be, you know, making a thing ourselves? What level of “fabrication” was even expected of us? There was supposed to be a $100 limit on materials, but of course rumours swirled– “I heard that group spent $300 on electronic components and clamed they’d had it all lying around the house,” etc– and direct questions about the expected balance between a professional-looking product and a product we actually fabricated ourselves were met with apparent alarm and confusion.
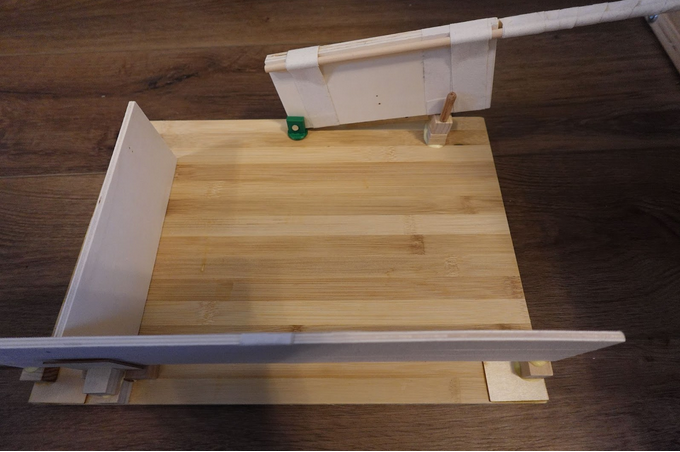
This theoretical speculation was cut short when, one class, a TA informed us that, despite the worksheet’s asking for a “screenshot” of your current prototype, we were actually required to have a new physical prototype built by the next day. So we stopped arguing about how to cut down the 3D printing time on the elaborate knife holder we’d planned. Instead I stopped by Dollarama on my way home from school, bought out their actually pretty extensive craft section, and made this:


 If it’s not clear– there are straight razor blades sticking out of that cleaver-looking thing. My groupmates found this very funny when I brought it to class the next session.
I had assumed that this was just a thing I was building so we’d have something to take a picture of for the submission due the next day; but once it was there, the constraints on fabrication remained, and it wasn’t obvious that we would really be improving it much by replacing wood parts with other materials. Wood is, after all, a perfectly acceptable material for a cutting board as well as many other useful objects, even if “pre-fabricated wood in sizes determined by Dollarama and glued together” isn’t exactly the ideal for high-quality woodworking projects. (I learned during this project that there are woodworking tools available at the Hatch centre; too late to be much use here, since it takes time to get certified to use them, but now that I know that I have all sorts of projects I want to bring there…)
More confusion along the lines of is this, fundamentally, what we are supposed to be doing here? A TA told us the thing basically looked fine as an object to have produced for this project. So my craft project ended up being the final product, with a few modifications– well, actually I had to make the whole thing over just to rearrange the parts a little, because the carpenter’s glue I’d used turned out to work too well. But the final prototype was still Dollarama wood, with a “real” knife instead of my razor-cleaver, and a wooden plate attached to the bottom of the dowel attaching the knife-swivel to the board, so it wouldn’t fall out. There was also a magnetized container added to the side. So, our final product was my first and last cooking vlog.